This area, where the engine and transmission meet, is prone to leaks because of the seals and gaskets that connect these two critical components. If you’ve noticed oil pooling under your vehicle or a burning smell from oil dripping onto hot engine parts, it’s time to take action.
In this post guide, we’ll walk you through the steps to diagnose and fix an oil leak between the engine and transmission, saving you time and potentially hundreds of dollars in repair costs.
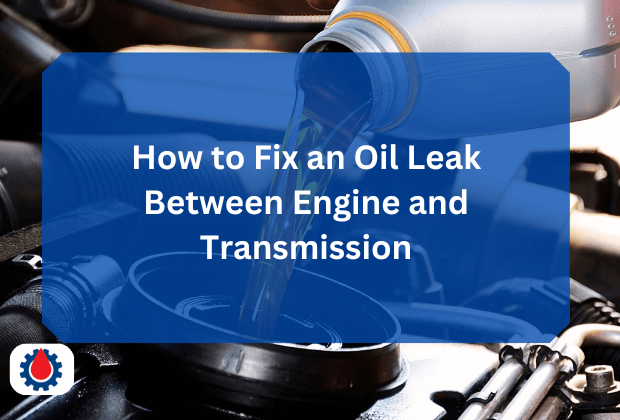
How to Fix an Oil Leak Between Engine and Transmission
Tools and Materials You’ll Need
Before diving into the repair, gather the following:
- Jack and Jack stands
- Socket wrench set
- Torque wrench
- Screwdrivers
- Seal puller
- Degreaser and rags
- Replacement rear main seal or transmission front seal
- Gasket sealant (if applicable)
- New oil and transmission fluid
- Oil filter (optional)
- Drain pan
- Safety gloves and glasses
Step-by-Step Guide to Fixing the Oil Leak
Step 1: Diagnose the Leak
Start by confirming the leak’s location. Park your vehicle on a clean surface and let it run for a few minutes. Check for fresh oil drips. Clean the engine transmission junction with a degreaser to remove old oil and grime, making it easier to spot the leak. You can also add a UV dye to the engine oil or transmission fluid, run the vehicle, and use a blacklight to trace the leak’s source.
If the oil is engine oil (typically amber or dark brown), the rear main seal is likely the issue. If it’s red or pinkish, it’s probably transmission fluid, pointing to the front transmission seal. In rare cases, both could be leaking, so be thorough.
Step 2: Prepare the Vehicle
Safety first! Disconnect the battery to avoid electrical hazards. Raise the vehicle using a jack and secure it with jack stands. Ensure it’s on a flat, stable surface. Place a drain pan under the work area to catch any fluid spills.
Step 3: Drain Fluids
To avoid a mess, drain the engine oil and transmission fluid. For the engine, remove the oil drain plug and let the oil flow into the drain pan. For the transmission, locate the drain plug (if equipped) or remove the transmission pan to drain the fluid. This step is crucial as it reduces fluid pressure and makes seal replacement easier.
Step 4: Access the Seal
This is the most labor-intensive part. The rear main seal or front transmission seal is located where the engine and transmission meet, so you’ll need to separate these components to some extent. Follow these steps:
- Remove the Driveshaft: For rear-wheel-drive vehicles, disconnect the driveshaft from the transmission. Mark the driveshaft and flange to ensure proper alignment during reassembly.
- Remove the Transmission: Unbolt the transmission from the engine. This may require removing the transmission cross member, exhaust components, and any connected wiring or linkages. Support the transmission with a jack to prevent it from falling.
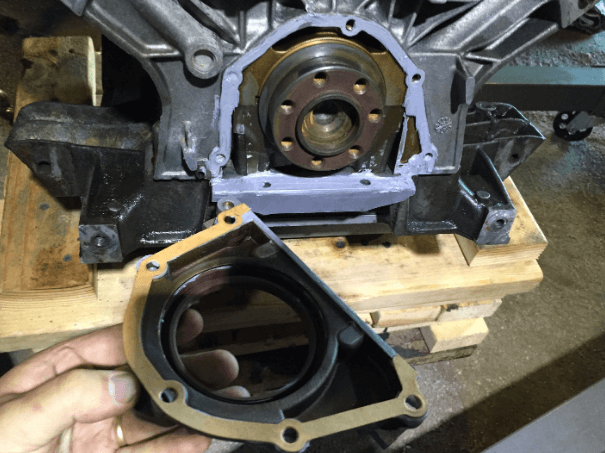
- Remove the Flywheel or Flexplate: The rear main seal is behind the flywheel (manual transmission) or flexplate (automatic transmission). Unbolt and carefully remove this component.
For front transmission seal replacement, you may need to access the torque converter or input shaft after removing the transmission.
Step 5: Replace the Seal
With the seal exposed, use a seal puller to carefully remove the old rear main seal or front transmission seal. Be cautious not to damage the crankshaft or input shaft. Clean the sealing surface thoroughly with a rag and degreaser to ensure a good fit for the new seal.
Install the new seal by gently tapping it into place using a seal driver or a socket that matches the seal’s diameter. Ensure it’s seated evenly to prevent future leaks. If the seal requires gasket sealant, apply a thin, even layer as per the manufacturer’s instructions.
Step 6: Reassemble Components
Reinstall the flywheel or flexplate, torquing the bolts to the manufacturer’s specifications. Reattach the transmission, ensuring all bolts are tightened properly. Reconnect the driveshaft, exhaust, and any wiring or linkages removed earlier. Double-check all connections to avoid issues during operation.
Related Engine Oil Leak – 7 Alarming Signs(How to Fix Them)
Step 7: Refill Fluids
Refill the engine with the recommended oil type and quantity. Replace the oil filter if needed. Refill the transmission with the correct type of transmission fluid (check your vehicle’s manual for specifications). Check for any leaks around the fill plugs or drain plugs.
Step 8: Test the Repair
Reconnect the battery, lower the vehicle, and start the engine. Let it run for a few minutes while checking for leaks. Take the vehicle for a short test drive, then reinspect the engine transmission junction. If no leaks are present, you’ve successfully fixed the issue!
Tips for Success
- Consult Your Vehicle’s Manual: Specifications for torque values, fluid types, and seal sizes vary by vehicle make and model.
- Work Methodically: Label bolts and components to make reassembly easier.
- Check for Other Issues: While you’re in there, inspect the clutch (for manuals) or torque converter (for automatics) for wear.
- Consider Professional Help: If separating the engine and transmission feels daunting, a professional mechanic can save time and ensure accuracy.
Related Additive To Remove Water From Engine Oil(Top 5 Best 2025)
Preventing Future Leaks
To avoid recurring issues:
- Use high-quality seals and fluids.
- Avoid overfilling the engine or transmission, as excess pressure can damage seals.
- Regularly inspect your vehicle for early signs of wear.
Common Symptoms of an Oil Leak
- Oil Spots Under the Vehicle: Look for dark, slick spots under the engine transmission area.
- Burning Oil Smell: Oil dripping onto the exhaust or hot engine components can produce a distinct odor.
- Low Oil Levels: Regularly needing to top off engine or transmission fluid is a red flag.
- Slipping Transmission: If transmission fluid is leaking, you might notice erratic shifting or slipping gears.
Related Is Engine Flush Before Oil Change Worth It(Dos & Dont)
When to Seek Professional Help
If the leak persists after your repair, or if you suspect a cracked engine block or transmission housing, consult a professional. These issues require specialized tools and expertise. Also, if your vehicle has a complex transmission (e.g., a dual-clutch system), professional intervention may be necessary.
FAQs
What would cause oil to leak from between the motor and the transmission?
An oil leak from the area between the engine and transmission is often caused by a failing rear main seal (engine side) or input shaft seal (transmission side). Other potential culprits include the oil pan gasket, crankshaft seal, or even an improperly sealed rear engine cover.
How to stop oil leak in engine without replacing gasket?
While the most effective fix is replacing a faulty gasket, you can try temporary solutions like:
- Using a high-quality engine oil stop leak additive
- Tightening bolts around the suspected leak area (if loose)
- Cleaning the area and applying engine sealant or RTV silicone (only for small, accessible leaks)
- These are not permanent fixes but may reduce or slow the leak temporarily.
How to stop gearbox oil leak?
To stop a gearbox oil leak:
- Inspect and tighten bolts on the gearbox housing and pan
- Replace worn-out seals or gaskets, especially the input/output shaft seals and drain plug washers
- Use a gearbox stop leak additive as a temporary solution
- Check for cracks or damage in the casing and repair or replace if needed
What seal is between the engine and transmission?
The most common seal between the engine and transmission is the rear main seal (engine crankshaft seal). In automatic transmissions, the torque converter seal (front pump seal) can also leak in this area.
How to fix transmission oil leak?
Fixing a transmission oil leak involves:
- Identifying the leak source – common spots include pan gasket, input/output shaft seals, cooler lines, and the front pump seal
- Replacing damaged seals or gaskets
- Tightening loose bolts and ensuring proper torque specs
- Flushing and refilling transmission fluid if needed
- In some cases, a stop leak additive can provide temporary relief, but it’s not a permanent solution.
What 3 things can cause an oil leak?
The three most common causes of oil leaks are:
- Worn or damaged gaskets/seals (e.g., valve cover, oil pan, rear main seal)
- Loose or missing bolts/plugs (e.g., drain plug, oil filter)
- Cracks or damage in the engine block, pan, or components
Final words
Fixing an oil leak between the engine and transmission is a challenging but rewarding DIY project. By carefully diagnosing the issue, using the right tools, and following a systematic approach, you can restore your vehicle’s performance and prevent further damage.